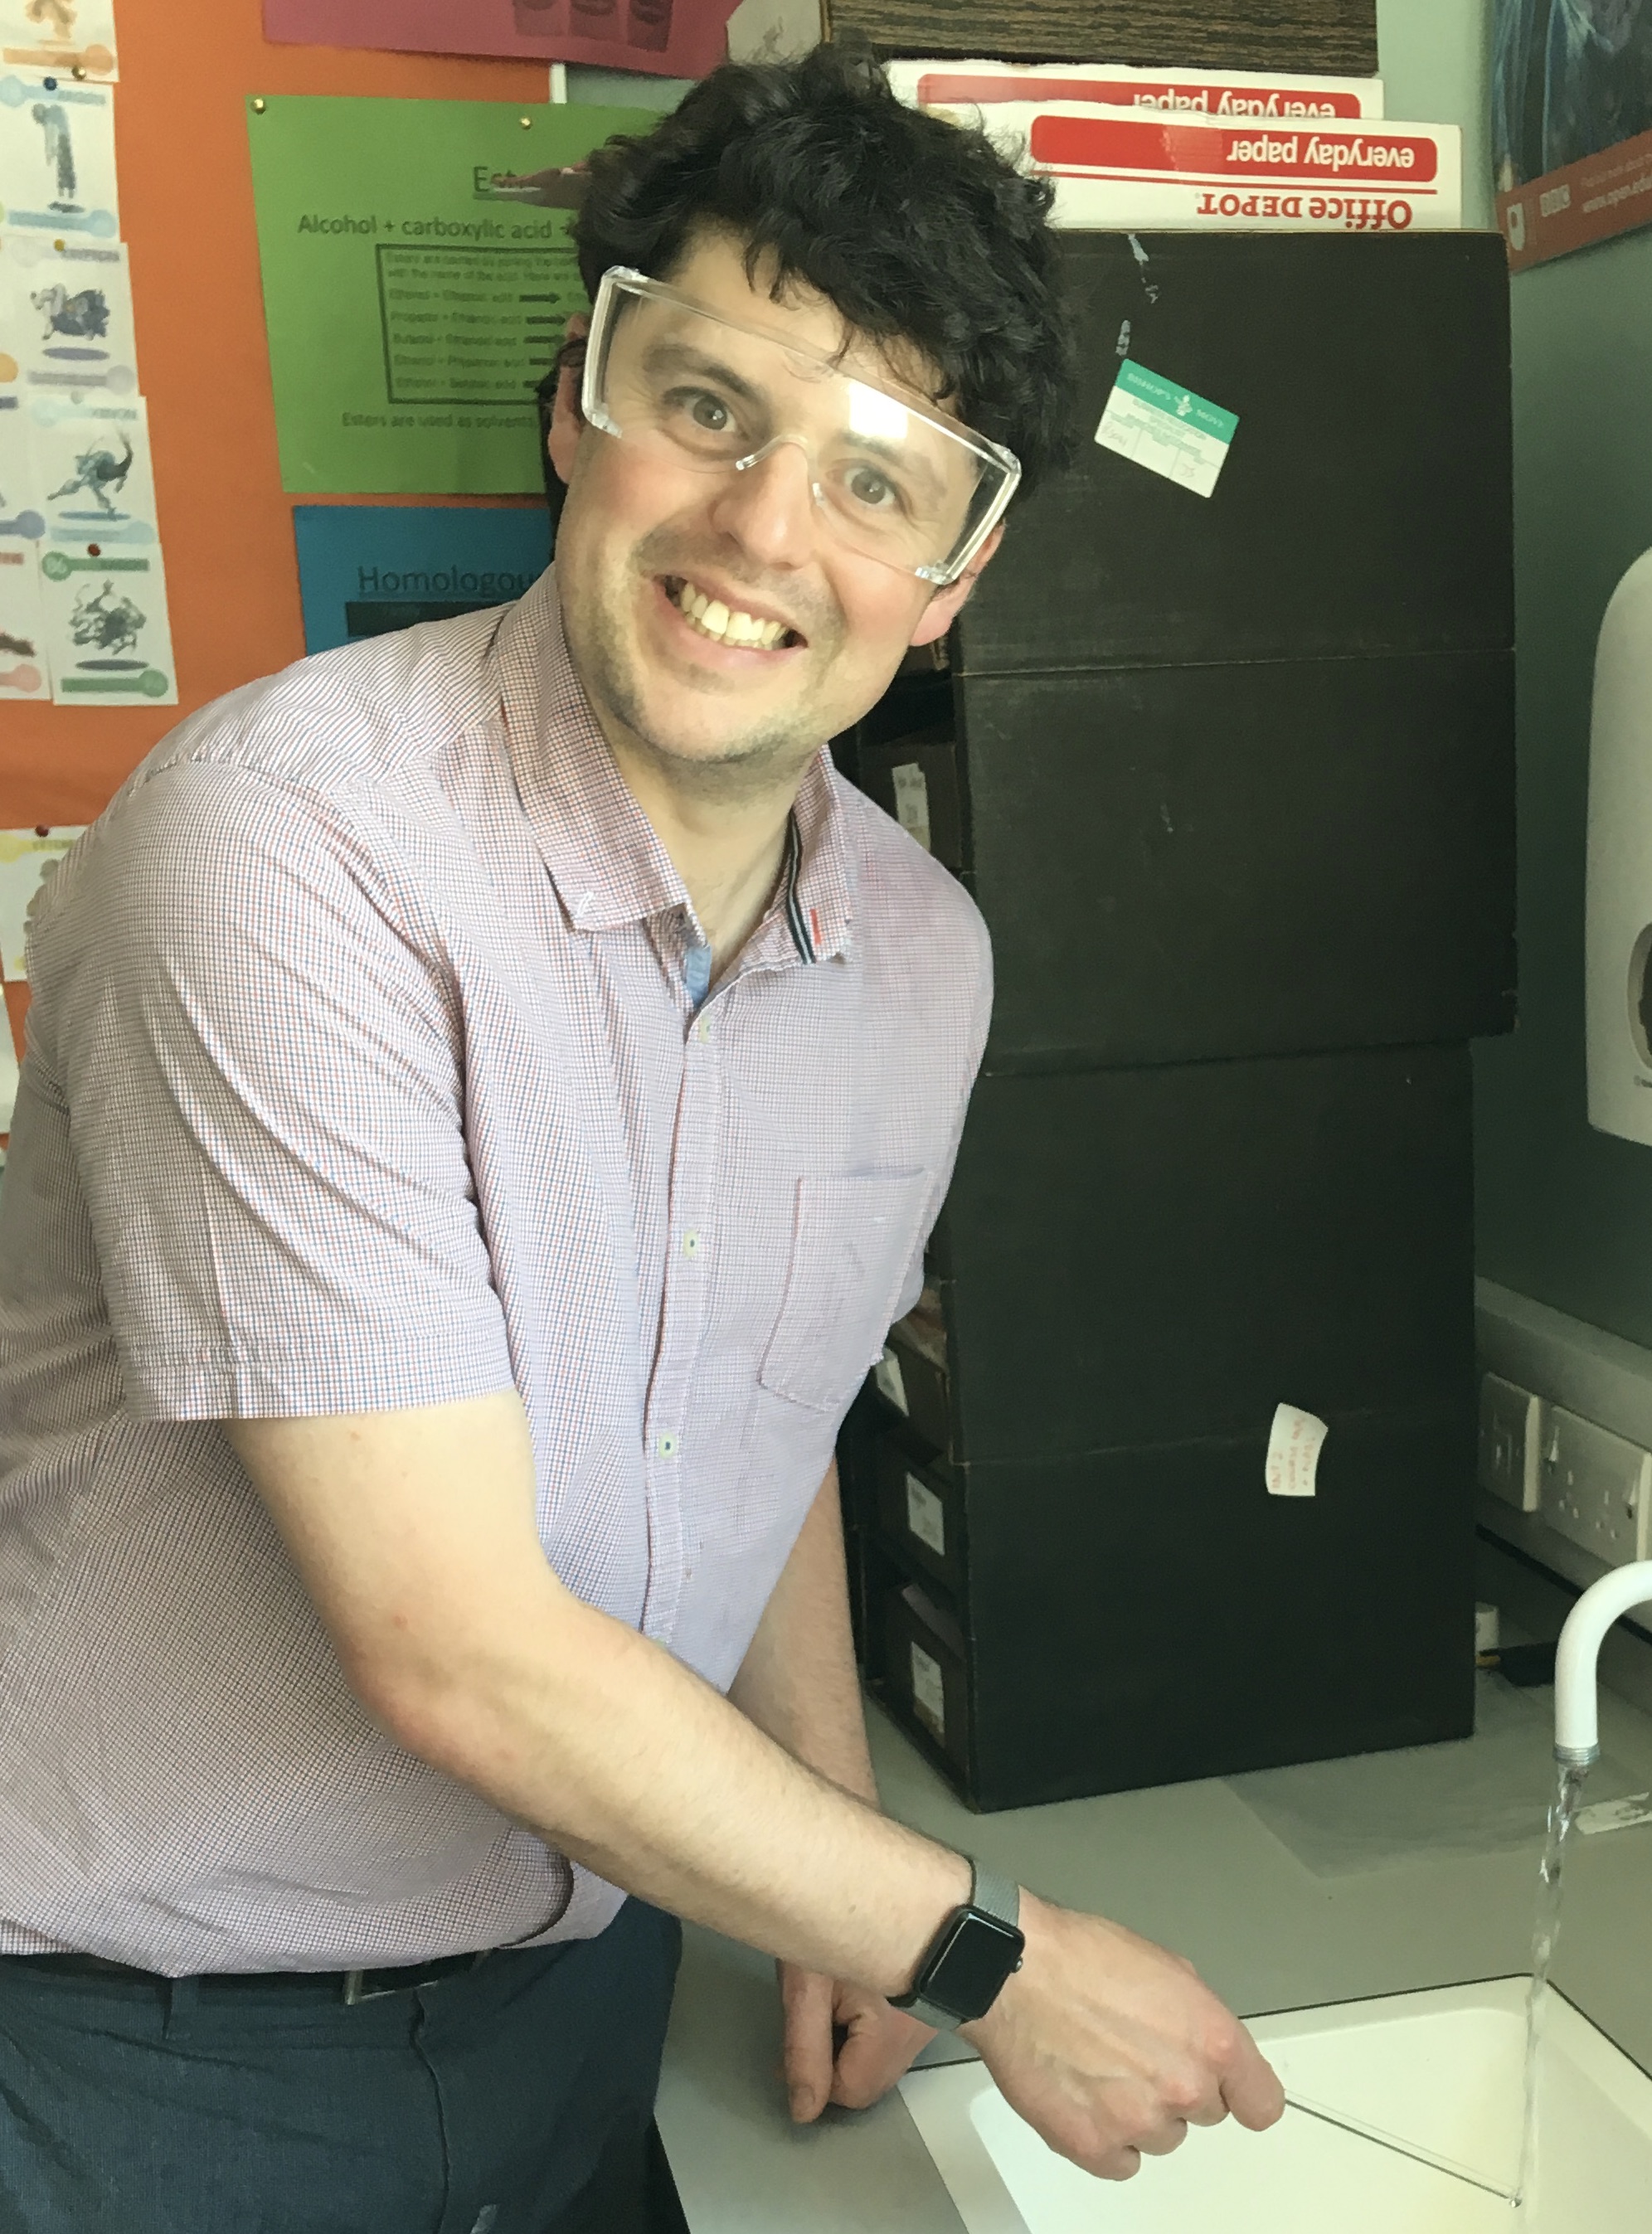

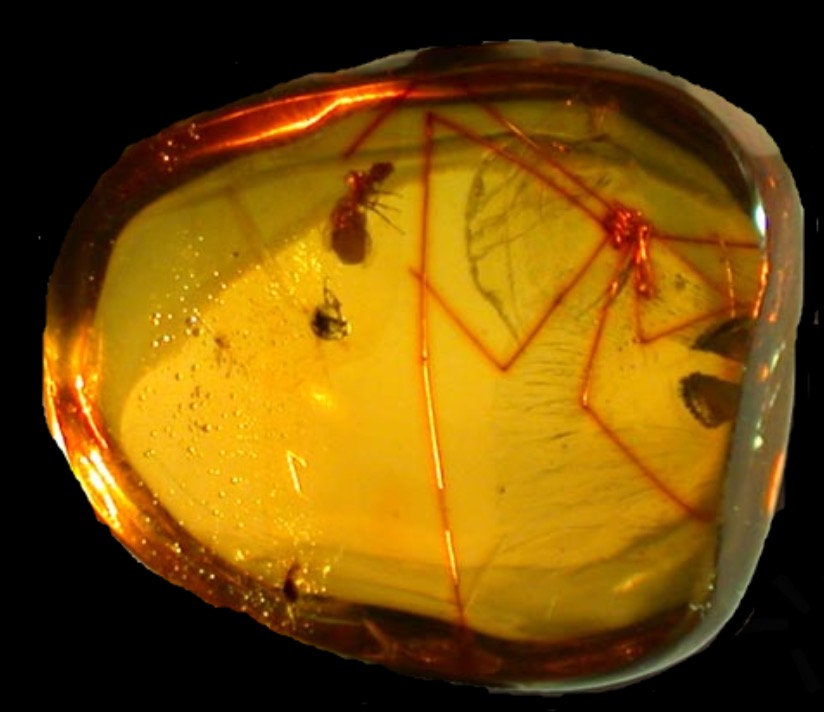
It is thought that the Greeks were the first to investigate electricity. The philosopher Thales of Miletus noted around 600 BC that pieces of amber could attract light objects after being rubbed. The word electricity itself comes from elektron, the Greek word for amber.
Watch the video below on static electricity.
Collect:
Rub one end of the rod with the duster and hold it close to a thin stream of water.
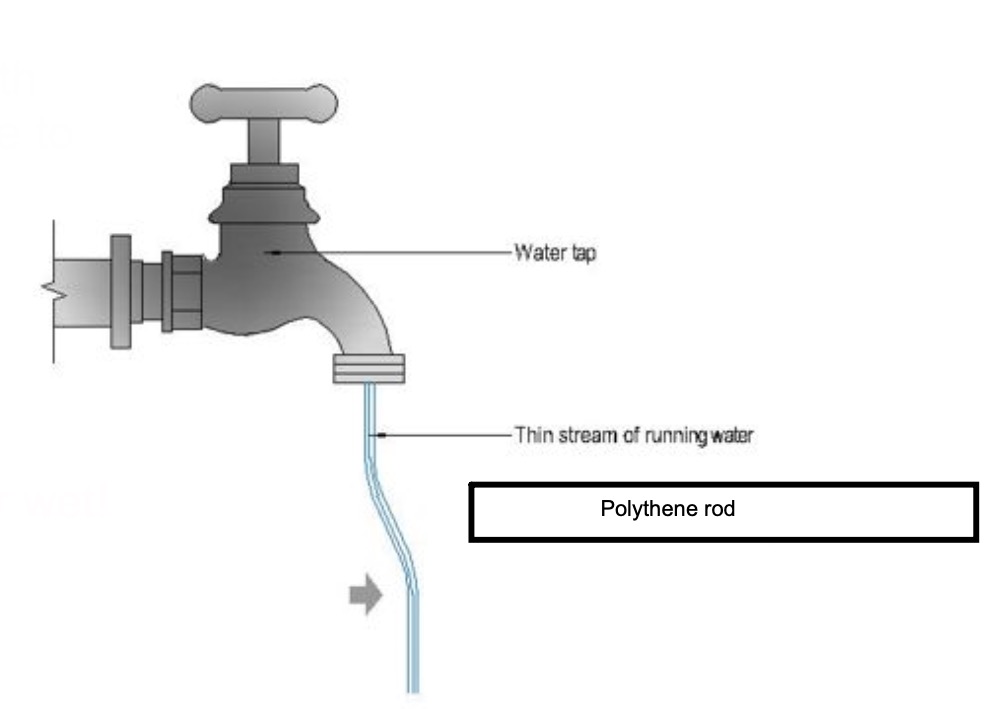
Don't get the rod or duster wet!
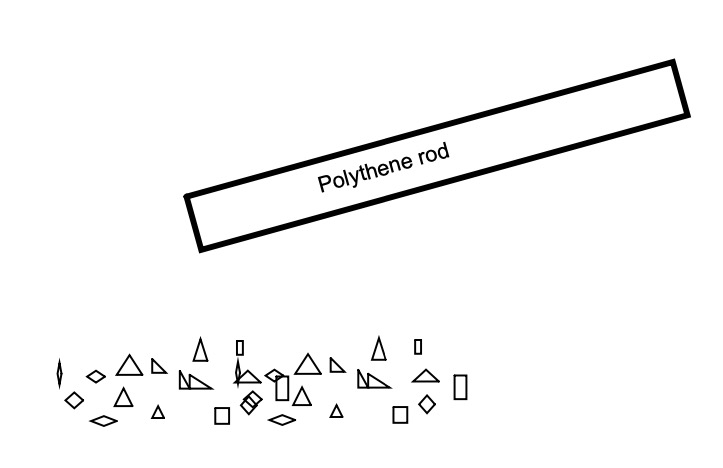
Rub one end of the rod with the duster and hold it close to small bits of cut up paper.
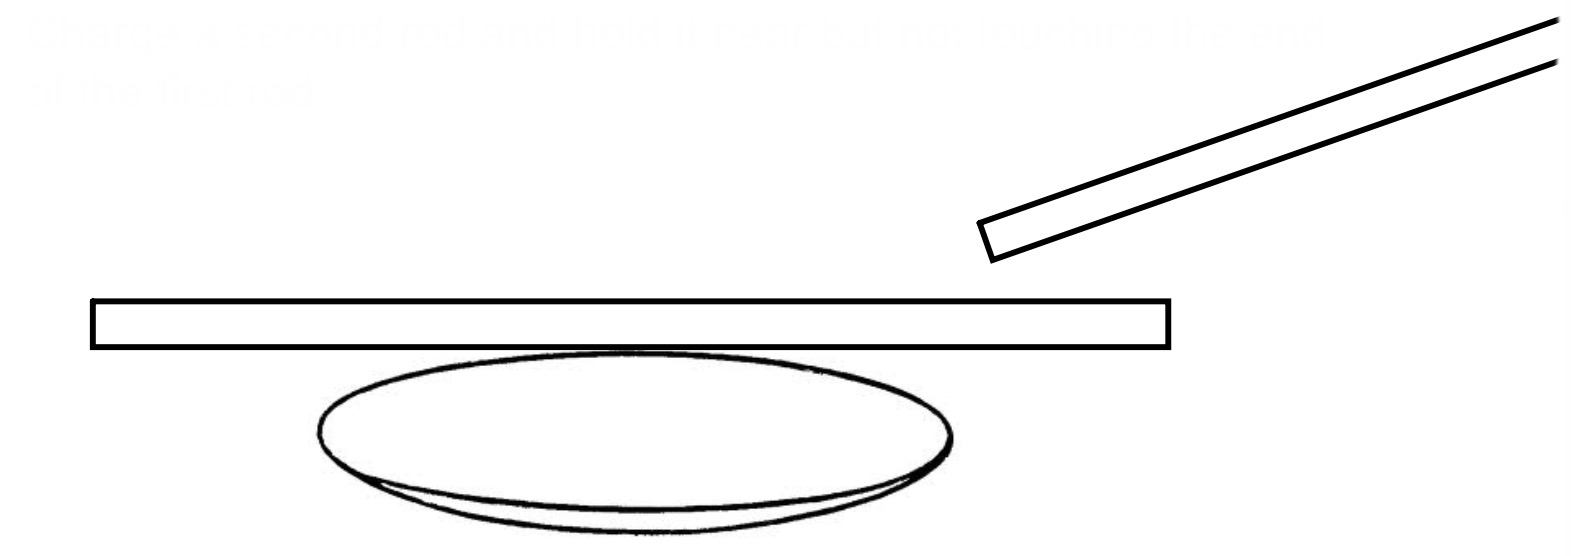
Take a rod and charge it well by rubbing with a cloth. Place it carefully on top of a watch glass being careful not to touch the table.
Charge a second rod and hold it near but not touching the end of the first rod.
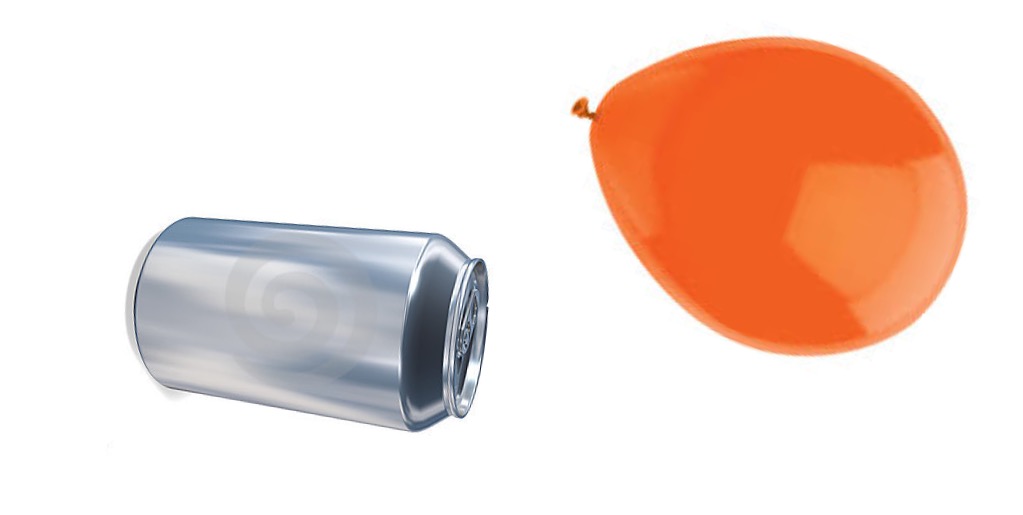
Charge up a balloon by rubbing it. Hold it near but not touching the aluminium can.
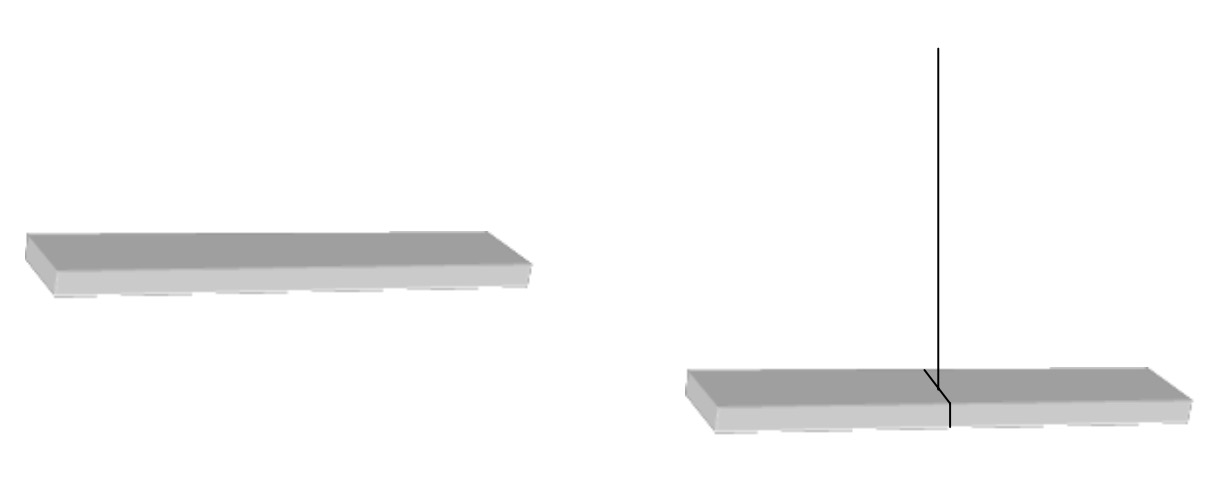
Collect two polythene rods (white) and two acetate rods (clear).
Pick two rods and rub both ends.
Suspend one by a thread (or use a watch glass), and bring the other close to it.
Try different combinations of rods.
Electric charges come is two types: n______ and p_______.
Charges of the same type will r____ each other.
Charges of different type will a______ each other.
Watch the video below on the Van de Graaff generator.
When electric current moves, we call it a c______.
Charge moves easily in materials made from m____.
We call these materials c_________.
Charge cannot move in materials like p______ and g____.
We call these materials i_________.

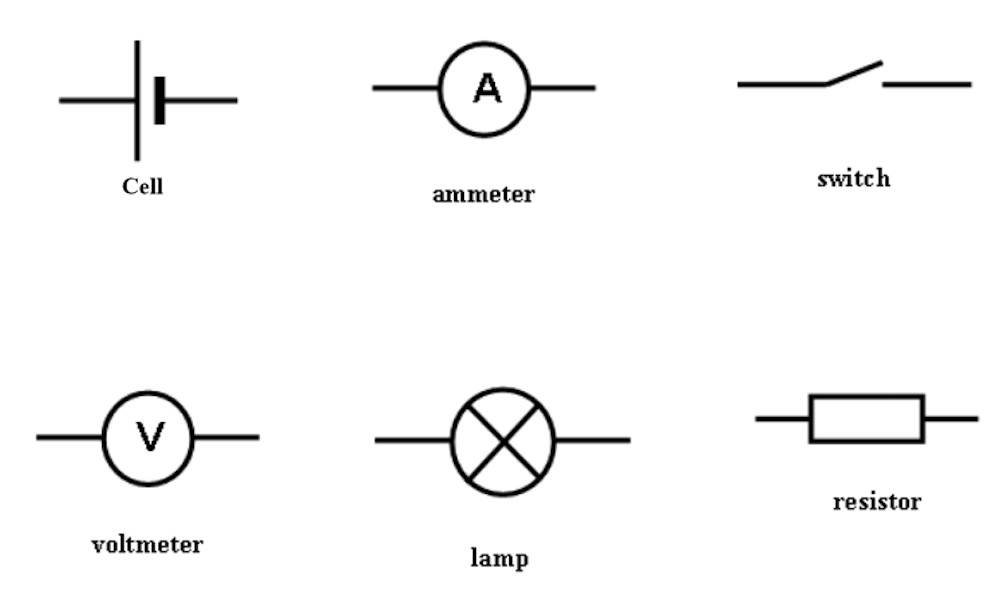
Copy and label the following symbols below.
The video below shows you haw to make a simple circuit using the PhET circuit construction kit.
Use the circuit simulation kit to make a simple circuit.


Draw circuit diagrams for the three circuits below. Remember to use the rules for drawing circuits.
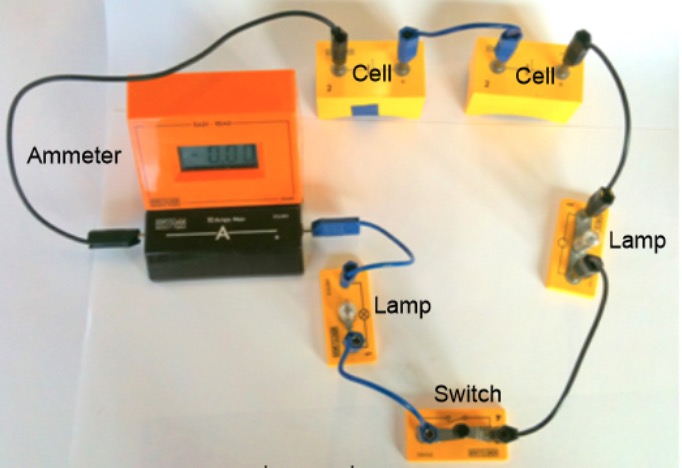
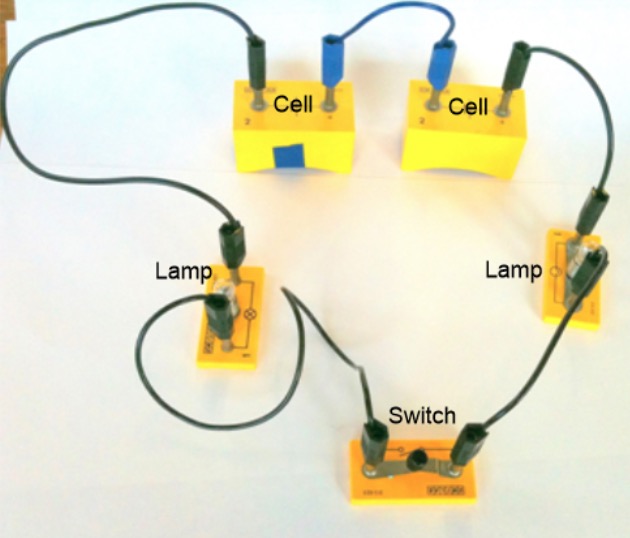
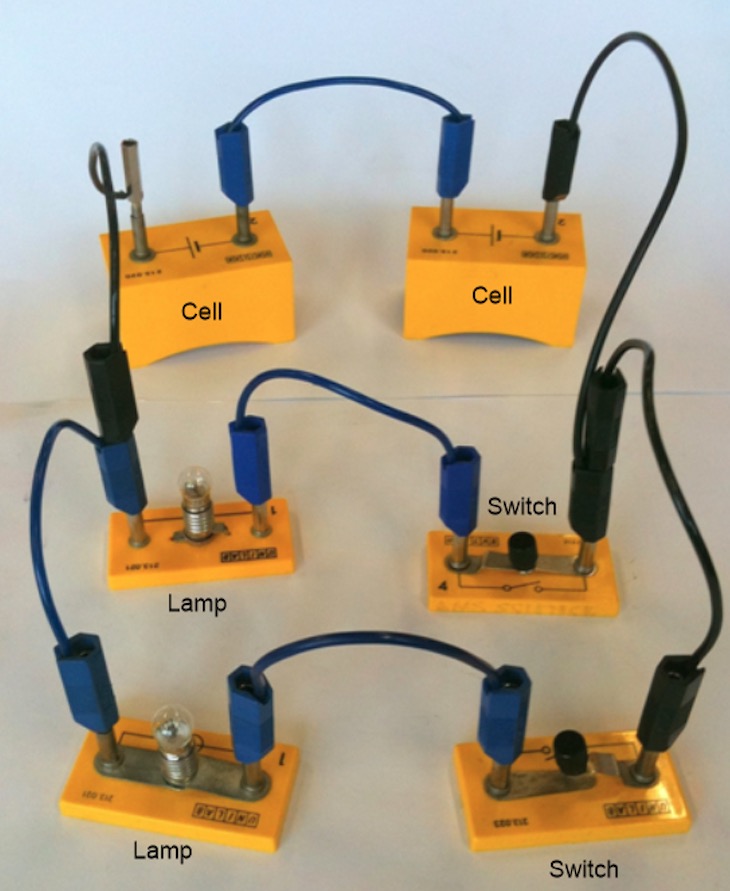
Collect the equipment below:
Copy the diagram below into your jotter and label the components. Remember the circuit diagram rules.
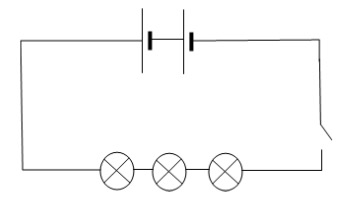
Answer the questions below in sentences.
1. What is a series circuit?
2. What happens to the other lamps if one lamp is unscrewed or stops working?
3. In a series circuit, what happens to the brightness of the lamps as more lamps are added?
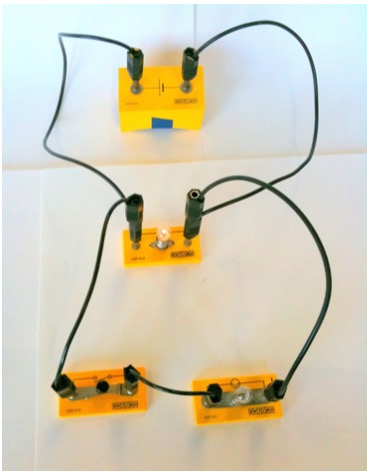
Collect the equipment below:
Draw a circuit diagram of this circuit. Remember Circuit Diagram Rules!
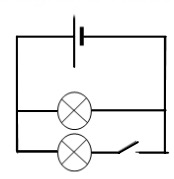
Answer the questions below in sentences.
1. What is a parallel circuit?
2. When you unscrew one bulb, what happens to the other?
3. The same didn't happen with a series circuit. Why does this happen with a parallel circuit?
Every electronic system has three main sections.
These are called the input, the process and the output

This is the block diagram for a calculator.
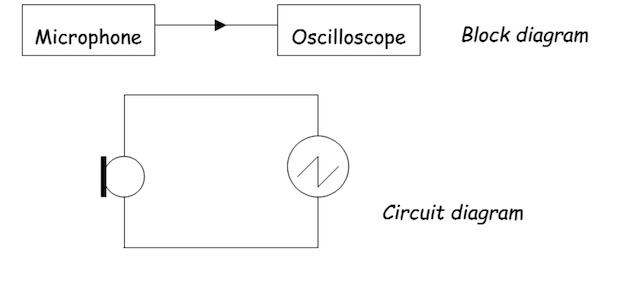
Watch the video below. Use it to help you answer the questions:
1. What energy change takes place in a microphone?
2. Is the microphone an input or an output device?
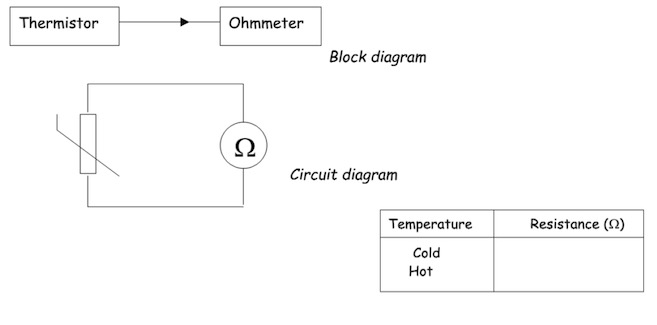
Watch the video below. Use it to answer the questions:
1. What happens to the resistance as the temperature of a thermistor goes up?
2. Is the thermistor an input or an output device?
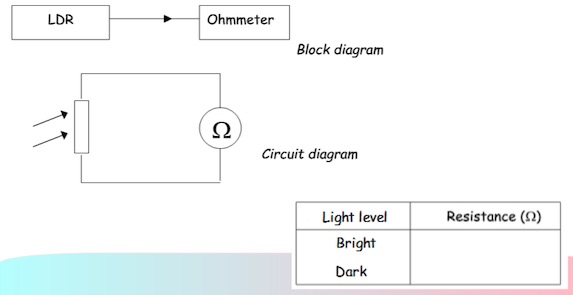
Watch the video below. Use it to answer the questions:
1. What happens to the resistance as the light level on an LDR goes up?
2. Is the LDR an input or and output device?
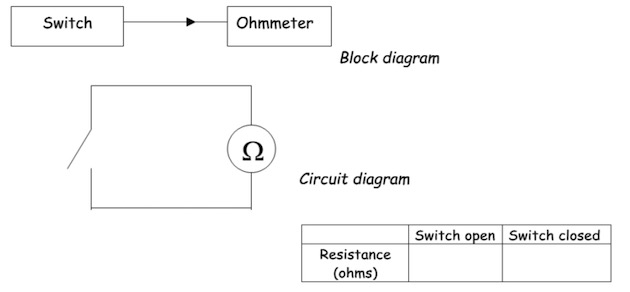
Watch the video below. Use it to answer the questions:
1. What happens to the resistance of the switch when it is closed?
2. What effect does the switch have on the current in a circuit?
3. Is the switch an input or an output device?
All output devices change electrical energy to another kind of energy.
E.g. A lamp:
Changes electrical energy to light and heat energy
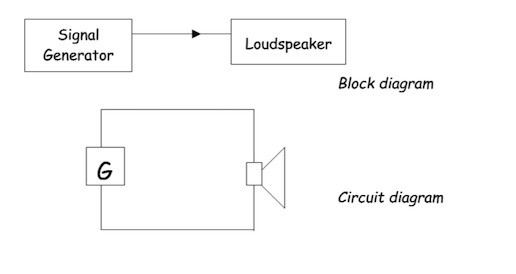
Watch the video below. Answer the following questions:
1. What is the energy change in the loudspeaker?
2. Is the loudspeaker an input or an output device?
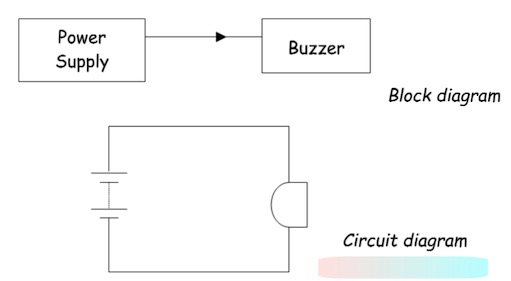
Watch the video below. Answer the following questions:
1. What is the energy change in the buzzer?
2. Is the buzzer an input or an output device?
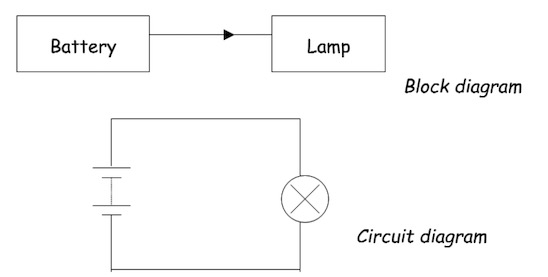
Watch the video below. Answer the following questions:
1. What is the energy change in the lamp?
2. Is the lamp an input or an output device?
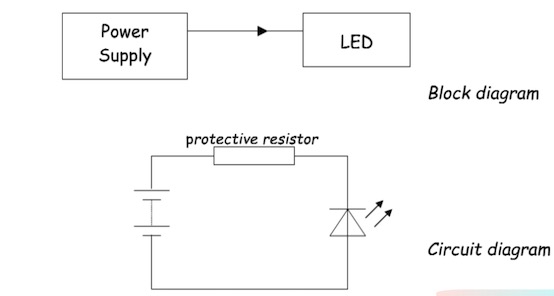
Watch the video below. Answer the following questions:
1. What is the energy change in the LED?
2. Is the LED an input or an output device?
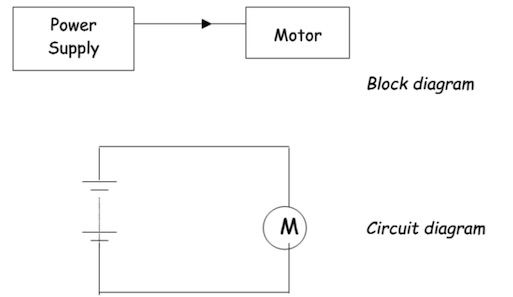
Watch the video below. Answer the following questions:
1. What is the energy change in the motor?
Is the motor an input or an output device?
Logic gates are used to combine or change electronic signals.
There are three basic types of logic gate called:
Components can be on or off:
off - logic 0
on - logic 1
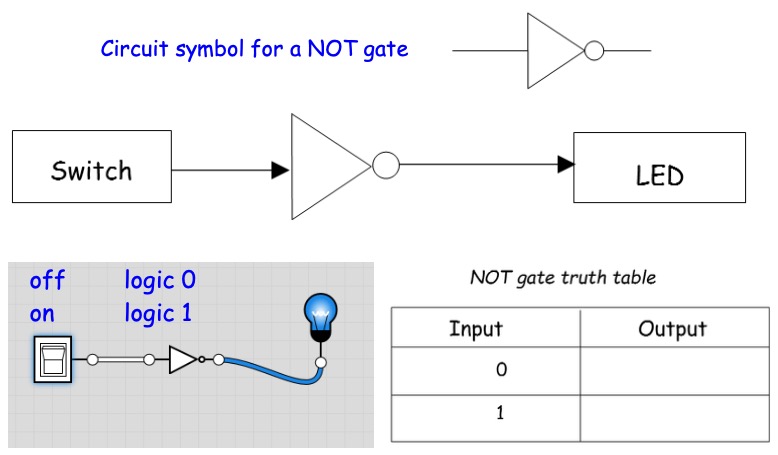
Use the video below to fill in the truth table for the NOT gate.
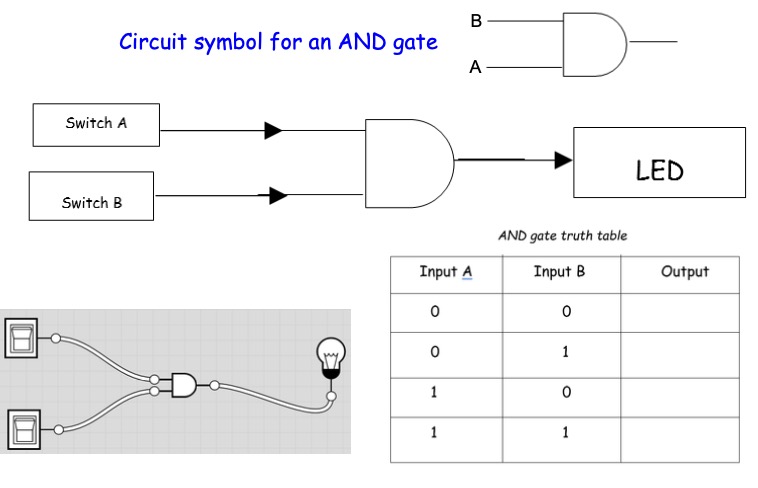
Use the video below to fill in the truth table for the AND gate.
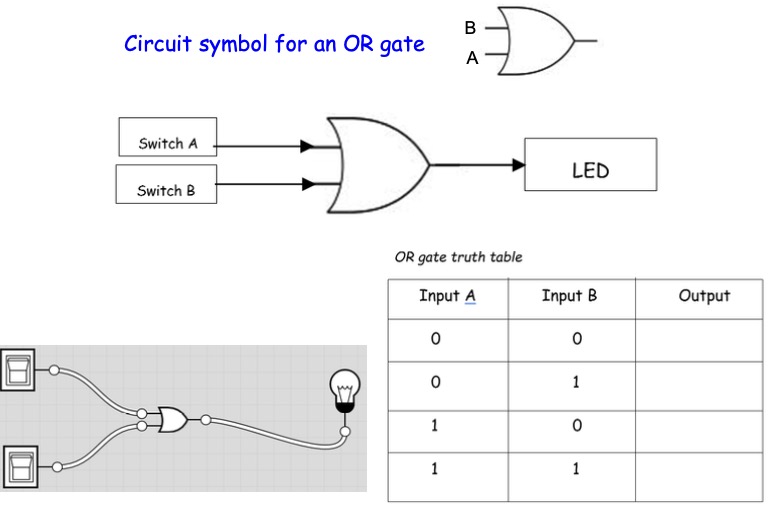
Use the video below to fill in the truth table for the OR gate